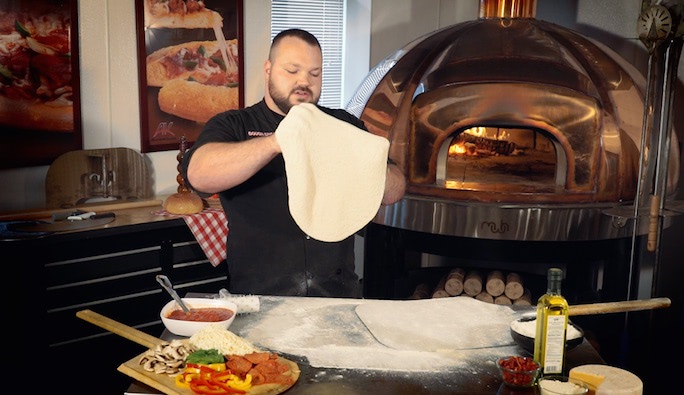
 Hand stretching pizza dough is part science and part art. It's also part of what makes customers loyal to your hand-tossed pizza — nearly 60% of pizza lovers say the crust is crucial in their pizza choice.
Come into the kitchen with Chef Luke from Alive & Kickin’ Pizza Crust for some insider tips and an expert demonstration of how to transform pre-made dough balls into hand-stretched pizza your customers crave.
TRANSCRIPT – Hand Stretching a Dough Ball
Starting with a dough ball that's been proofed for 48-72 hours and kept under plastic to preserve its smooth and soft texture, use a dough scraper to gently pick up the dough ball. It may seem like common sense, but keep the dough ball as round as possible, since round dough balls make round pizzas.
Initial Preparation: Surface and Dough Ball
Liberally flour your table. You don’t want your pizza sticking to the table; you want it nice and smooth. Then place the dough ball in the center of the prepared surface, and flour the top. Now you’re ready to hand stretch the dough!
8 Steps to a Perfectly Hand-Stretched Pizza
1. Create a 1” edge
The pizza’s crust is usually the first thing people notice, so you want to put a nice edge on it. Starting about an inch from the edge of the dough ball, use your fingers to press the dough down on the interior of the ball (leaving the edge thick). Press hard — you won’t press through the dough ball. Continue to flatten the interior of the dough ball, rotating it to maintain a round shape and consistent edge. The dough ball will get bigger during this process, but only by a few inches. It is not intended to be the final pie size.
2. Roll with dough docker
The best style of dough docker to have on hand, in our opinion, is a roller docker with a stainless steel or cast aluminum handle and stainless steel pins. The plastic ones, or unusually shaped rollers, don’t work as well.
Roll the docker over the dough ball, pushing all the way through. Roll all the way out to the edge and across the middle. Flip the dough ball and repeat.
RELATED: For more tips on pizza-making tools, watch this video!
3. Determine the baking surface
What you bake the pie on depends largely on the oven. For most types of ovens — like conveyor or deck ovens — people use baking screens. If using a wood-fired oven (which is what we're using in the video for our New York style pie), you can prepare the pizza on a peel and cook it right on the oven surface. It’s important to flour the peel. You can use semolina flour, corn meal, corn starch — anything that will not make the dough stick to the peel.
4. Drape dough over knuckles and stretch from edge
Pick up the dough ball. Drape it over your knuckles so you can just see the dough ball’s edge when looking at the back of your hands. Work your way around the pizza, stretching only the edge. Don’t pull from the middle. Gravity will do the rest.
5. Add the sauce
Once you’ve stretched the dough ball to the desired size, place it on the peel and arrange into a round shape. Spoon a generous amount of fully prepared pizza sauce into the center of the dough ball. Using the back of a spoon and a back-and-forth motion, spread the sauce up to the 1” edge you created on the pie crust. When spreading the sauce, rotate the pizza not your body. You’ll not only be more comfortable, you’ll be able to evenly spread the sauce and your pizza will look really good.
6. Add the cheese
Sprinkle shredded mozzarella cheese evenly over the entire dough ball, all the way to the edge of the sauce. As your pizza starts to bake, the crust rises first, and the lift will cause all of the cheese to slide into the middle of the pie if not distributed to the edge of the sauce. Once you’ve sprinkled on the cheese, you can gently lift the edge of the dough ball to “flip” stray cheese strands off of the crust. This step is not necessary, but it makes for a clean crust presentation.
7. Add toppings
For any toppings, like the pepperoni we’re using on our pizza today, make sure you put them out to the edge of the sauce and cheese.
8. Bake
If using a peel, gently shake it before sliding into the oven to ensure your pizza won’t stick. Bake until the crust is golden brown and cheese is bubbly. Slice with a roller cutter and serve.
Pies with hand-stretched dough is a great addition to your offerings — but have you considered hand-tossed style par-baked crusts? Learn all about them below.


